How to use Plesk to protect directories with a password
This article describes how to use Plesk to protect specific directories with a password. Visitors to password-protected directories must enter a username and password to view the directory's contents.
Adding password protection to a directory
When you add password protection to a directory, site visitors are prompted for a username and password when they try to access it. They can only view the directory contents after typing a valid username and password.
To watch a video that demonstrates the following procedure, please click below:
To add password protection to a directory, follow these steps:
- Log in to Plesk.If you do not know how to log in to your Plesk account, please see this article.
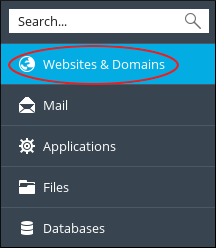
- In the left sidebar, click Websites & Domains:

- Click the Password-Protected Directories icon.
- Under Tools, click .
- Under Settings, in the Directory name text box, type the name of the directory you want to protect.
Do not include httpdocs in the directory name. Only type the name of the directory.
- In the Title of the protected area text box, you can optionally type a name for the protected directory.
- Click .
- Under Protected directories, click the name of the directory you specified in step 5.
- Under Tools, click Add a User.
- Under Protected directory user, in the Username text box, type a name for the user.
- In the New Password and Confirm Password text boxes, type the user's password.
- Click . Password protection is now enabled for the directory.
Removing password protection from a directory
You can remove password protection from a directory if you no longer want to protect it with a password. To do this, follow these steps:
- Log in to Plesk.If you do not know how to log in to your Plesk account, please see this article.
- Locate the directory for which you want to remove password protection, and then select the check box to the left of the directory name.
- Click .
- On the Removal Confirmation page, select the Confirm removal check box.
- Click . Plesk removes password protection for the directory.
More Information
For more information about Plesk, please visit https://www.plesk.com.
Article Details
- Operating System: Linux Hosting
- Control Panel: Plesk
- Product: Managed WordPress with Plesk
- Level: Beginner
Grow Your Web Business
Subscribe to receive weekly cutting edge tips, strategies, and news you need to grow your web business.
No charge. Unsubscribe anytime.
Did you find this article helpful? Then you'll love our support. Experience the A2 Hosting difference today and get a pre-secured, pre-optimized website. Check out our web hosting plans today.