How to Integrate MailChimp and GetResponse With WordPress
Email marketing is one of the most powerful tools at your disposal, whether you’re running a large or small business website. Before you can take full advantage of your chosen email marketing tool, however, you’ll need to integrate it with your WordPress site. Otherwise, people won’t be able to subscribe to your mailing lists in the first place.
Fortunately, most modern email marketing tools make it simple to integrate their services with WordPress. If you use the right plugin, connecting your email marketing platform to your website shouldn’t take you more than a few minutes. Then, you can start growing your email list more effectively.
In this article, we’re going to talk about why you should be using an email marketing service. Then we’ll teach you how to integrate two of our favorite options – MailChimp and GetResponse – with WordPress. Let’s get to work!
Why You Should Consider Using an Email Marketing Service
WordPress is capable of sending emails to your users out of the box. However, it’s only configured to handle simple tasks, such as registration confirmations and various notifications. If you want to do something more complex, such as create and send full-blown email campaigns, you’ll need to use a dedicated email marketing service.
There are plenty of email marketing services to choose from these days, and many of them are compatible with WordPress. You can use these tools to benefit your website and grow your audience, by:
- Using email lists to drive conversions.
- Staying in touch with your users through email campaigns.
- Automating campaigns using autoresponders.
Thanks to WordPress’ popularity, most email marketing services provide you with the tools you’ll need to integrate them with the platform. Even better, performing the integration is usually pretty simple.
2 Ways to Integrate an Email Marketing Service With WordPress
Below, we’re going to introduce two of the most powerful email marketing services you can use. We’ll look at what makes them so beneficial, and then explain how you can integrate each with your WordPress website.
1. Use MailChimp Alongside Your WordPress Site

MailChimp is a very popular email marketing platform, which stands out thanks to its robust free plan and user-friendly interface. It includes all the tools you’ll need to tackle email marketing, including campaign builders, analytics tracking, and an intuitive autoresponder system.
If you’re new to email marketing, MailChimp is a smart option thanks to all the advanced options its free plan offers. Plus, that same plan supports up to 2,000 subscribers and 12,000 emails per month. That’s more than enough for a growing website.
To start using the platform with WordPress, go ahead and sign up for a MailChimp account, choosing the plan you want to use. Next, you’ll need to create your first email list.
When your email list is ready, install the MailChimp for WordPress plugin on your website and activate it:

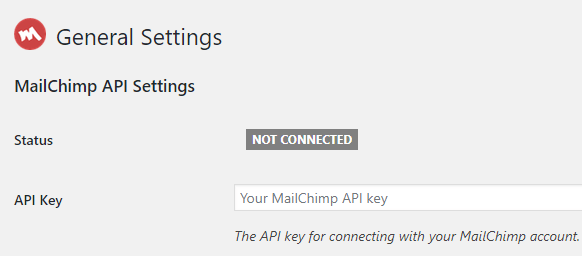
Then, navigate to the plugin’s setting screen. You’ll find a field where you need to add your MailChimp account’s API key:

Once you’ve done that, save your settings and head to the MailChimp for WP > Forms tab. Inside, you’ll be able to set up a new form by choosing a name for it and clicking on the Add New Form button. If you have more than one email list available, you’ll also be able to choose which one your form should be linked to.
On the next screen, you can edit the fields your form will include. By default, the plugin will start you off with a simple but functional signup form, which you can tweak to suit your needs.
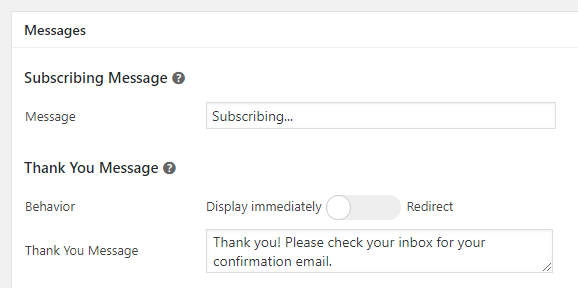
If you go to the Messages tab next, you’ll be able to configure the messages your form will display if there’s an error during the signup process, and when a subscription is successful:

When you’re done, save your changes and scroll back up to the form’s title. Look for the shortcode right underneath:

You can paste this shortcode on your site, wherever you want to display the form. Alternatively, you can add it to your sidebar or footer using the widget added by MailChimp for WordPress, which you can find under Appearance > Widgets.
Your form will now be integrated with your site! Users will be able to sign up for your email list, and you can get to work on your first campaign.
2. Configure GetResponse to Work With WordPress

As far as email marketing goes, GetResponse shares most of its major features with MailChimp. It enables you to set up sophisticated campaigns using a simple builder, and provides access to plenty of pre-built layouts. You can also use it to set up autoresponders.
The main difference is that GetResponse provides you with a lot more styling options for your signup forms. This is a great feature, but it comes at an extra cost. GetResponse doesn’t offer a free tier, and plans start at $15 per month for up to 1,000 signups.
To get started with this platform, you’ll need to set up a GetResponse account and install the GetResponse Forms by Optin Cat plugin for WordPress. This isn’t the official GetResponse WordPress plugin, but in our experience, it provides the smoothest integration with the platform:

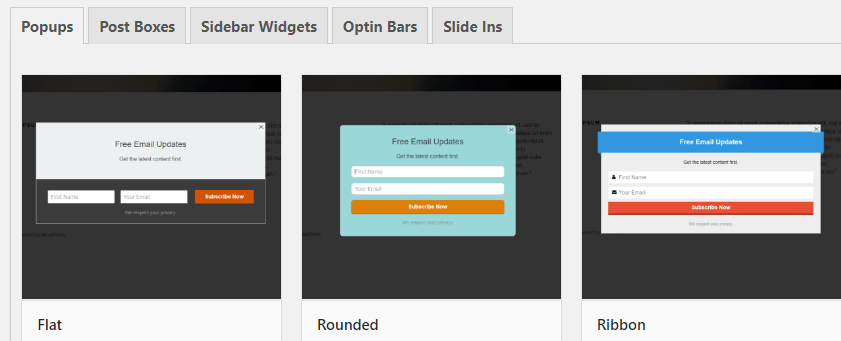
After activating the plugin, go to the Optin Forms > Add New tab. Inside, you’ll find multiple sections filled with styles for your new signup form:

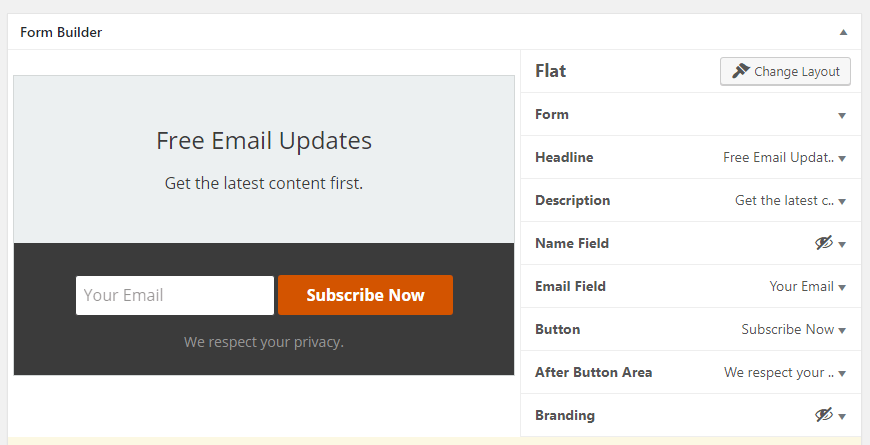
On the next screen, you’ll be able to customize your signup form’s appearance:

Next, the plugin will ask you for your GetResponse API Key so you can connect it with the platform. Further down on the page, you’ll be able to customize your signup form’s initial text, as well as its success and error messages:

Depending on which type of form you chose earlier, you’ll get different options for displaying it on your website. For example, sidebar widgets will need to be activated from the Appearance > Widgets tab. Post boxes, on the other hand, will provide you with a shortcode you can paste anywhere on your website:

GetResponse provides you with a lot of versatility when it comes to the placement of your signup forms. Feel free to play around with different styles and locations until you find one that suits you, and then get to work on your first campaign.
Conclusion
Email is one of the most effective ways to stay in touch with your user base, keep them up to date on your latest projects, and even generate conversions. Of course, you’ll need an email marketing platform you can integrate with WordPress. Adding this type of service to your website will help you get the most out of your campaigns.
Almost all major email marketing platforms can be integrated with WordPress without much trouble. Here are two of our favorite options:
- Use MailChimp alongside WordPress, using the MailChimp for WordPress plugin.
- Configure GetResponse to work with WordPress, using the GetResponse Forms by Optin Cat plugin.
Image credit: Pixabay.


