How to Conduct a Content Audit for Your Blog
If you’re a blogger, you’ll know it’s crucial to provide new content to your readers on a regular basis. However, if you’re not revisiting your older content, you’re leaving money on the table. While you’re busy crafting new content, those aging posts might not be providing the value they could be. In fact, they could well be hurting your Search Engine Optimization (SEO.)
In a nutshell, all posts will age over time, and the best way to keep your content as evergreen as possible is to perform a content audit. However, it’s a big job and requires a solid plan of attack to succeed.
In this article, we’ll run through five ways to conduct a content audit for your blog. Before this, let’s discuss what a content audit is in more detail. Let’s get started!
What a Content Audit Is (And Why You Might Want to Conduct One)
In short, a content audit is the process of compiling, organizing, and analyzing all of the posts on your blog to see whether the content needs updating, consolidating, or removing.
There are many potential benefits to regular blog content audits, including:
- Discovering broken links
- Discovering outdated information
- Optimizing older content for newer practices and developments.
- Streamlining your content to make sure it fits with your current vision.
Given the task at hand, you won’t want to do this every month – once or twice a year will be good enough to ensure your blog is in tip-top shape.
How to Conduct a Content Audit for Your Blog (In 5 Steps)
Conducting a content audit for your blog can take a while, especially if you have a lot of content. However, it’s not a complicated process and it can yield valuable results. Here’s a breakdown of how to get the job done.
Step #1: Gather Your Blog Post URLs and Data
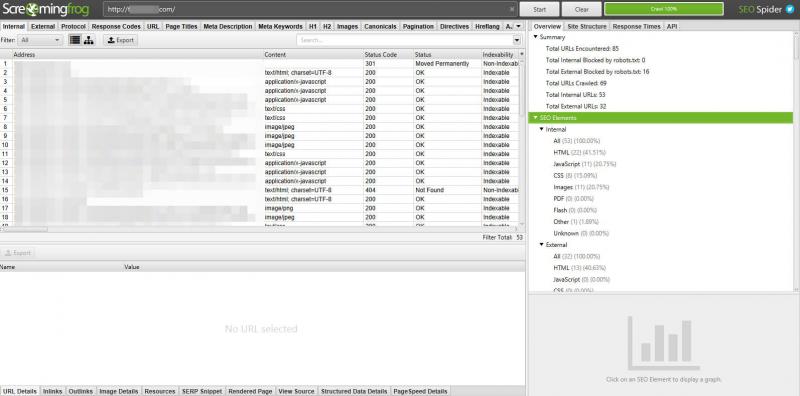
The first step is to compile a complete snapshot of all your existing blog content. To do this, you’ll need to find every article URL on your blog, and collate them (a spreadsheet is ideal.) While you could do this manually, a large amount of content may require a tool such as Screaming Frog:

To quickly explain how to use this, enter the URL into the crawler’s search bar and click the Start button. The tool will then crawl your site and dump all of the URLs into a spreadsheet for easy analysis.
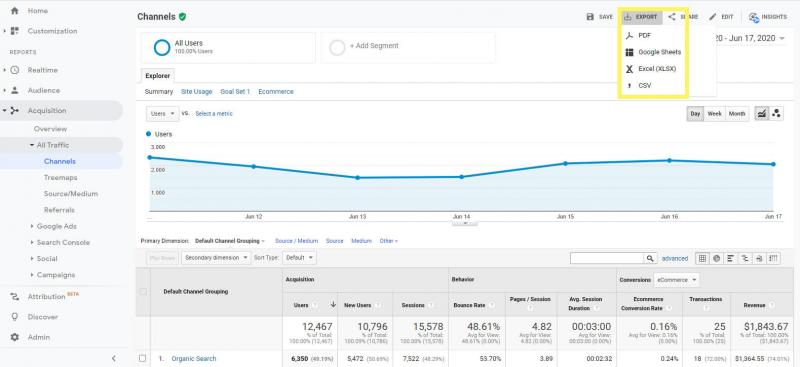
At this point, you’ll have some actionable data to use, but may want to add analytics as well. Some tools (including the premium version of Screaming Frog) will handle this for you, although you can also add it yourself through Google Analytics:

The specific Google Analytics reports you’ll want to add will depend on the goals you have for your blog. You’ll likely want to know how people are finding your site and which posts are performing the best. For each report you’d like included, click on Export and choose your desired file type.
Once you have the right data, it’s time to discover what it’s telling you.
Step #2: Analyze Your Data
While this step will vary based on what you want to accomplish with your audit, there are some data points you’ll always want to consider.
First, select your highest performing posts. While you’ll ultimately polish these posts using this process, they can also help guide future content. You should look for topics that haven’t been covered thoroughly, and add them to your editorial calendar.
Next, look for articles that aren’t performing as well as they should, using your analytics reports from earlier. While the reasons for underperformance will be individual, there may be simple mistakes keeping them from reaching their full potential. For example, note posts that may be missing meta descriptions or contain broken links.
Finally, have a look at your posts with little to no traffic. While you’ll likely delete a few of these based on your vision and goals, you may still be able to use the content. For example, shorter posts can be expanded or combined to create an ‘ultimate’ guide. You essentially want to give your content the best chance to succeed.
Step #3: Improve Your Posts’ Search Engine Optimization (SEO)
Throughout your analysis, you’ll probably see opportunities to improve your SEO. Even if you’ve been careful to avoid some of the more common SEO mistakes, this audit will have likely unearthed a few you missed.
Your headline is a great starting point for improving your SEO. Compelling headlines appeal to the reader’s emotions while still being informative. If you’re struggling to create a strong headline, you can use a headline analyzer tool to help.
‘Alt text’ helps site crawlers and visually impaired visitors to understand your images. Adding detailed alt text to images is also an easy way to boost SEO. This is potentially another opportunity to include your chosen focus keywords.
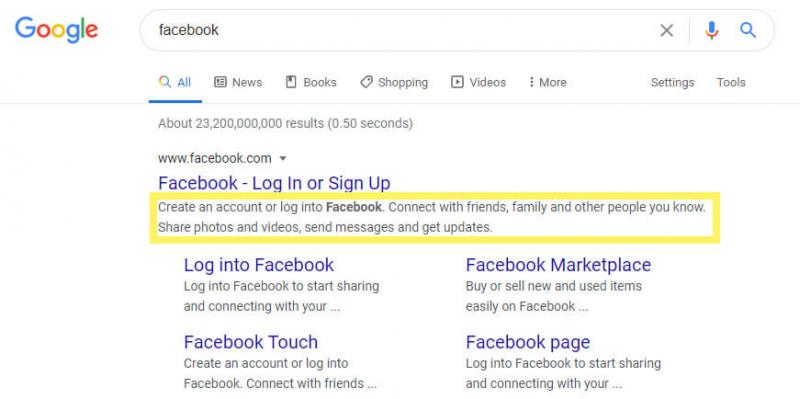
You’ll also want to ensure all posts have meta descriptions. Like alt text, they help search engines understand what your page is about:

Usually, the meta description is displayed on the Search Engine Results Page (SERP), so it’s also an opportunity to convince potential readers to click through. Writing the perfect meta description takes some practice, but it’s a skill worth perfecting.
We’ve discussed them briefly already, but broken links act like walls to search engine crawlers, stopping them from fully exploring, indexing, or ranking a page. Broken links also negatively impact your reader’s experience. Your audit will find most of these links, but there are other tools you can use to be sure you fix all your broken links.
Step #4: Update Facts and Statistics
Even if links are working, they can damage your reputation as an expert if they direct readers to outdated information. It will help if you comb through any outbound links pointing to studies, statistics, product pages, and pricing information to ensure they’re still relevant.

Finding updated information is something you’ll want to do at least once a year to maintain credibility. Depending on your blog’s topic, you may have to do this even more often. Fortunately, a quick search should get you the info you need, especially when using advanced search options. For Google, you can find these by clicking on Tools, then selecting the desired timeframe from the drop-down menu.
Finally, don’t forget to update any related text and images in your blog post once you’ve found the latest information.
Step #5: Conduct a Speed Audit
While speed may not come to mind when you think of auditing content, site loading speed does affect SEO. Additionally, a site that loads slowly can cause potential readers to click away, driving up your bounce rate. Sites that load faster have longer sessions and lower bounce rates.
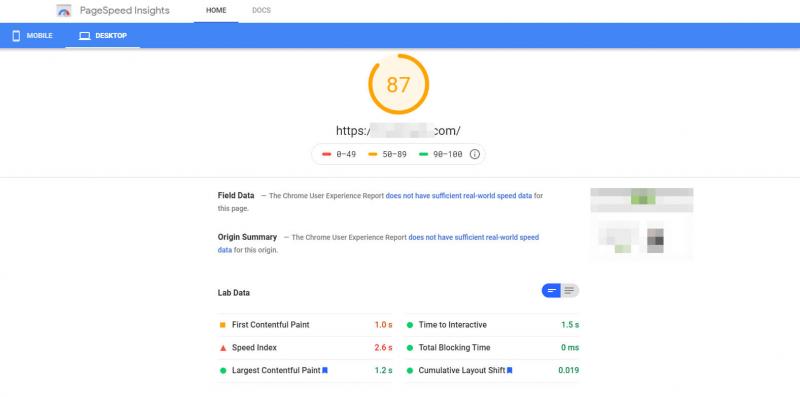
Google’s PageSpeed Insights can check your page load speed on both desktop and mobile devices:

In either case, it’s best to aim for a load time of five seconds or less, but faster is always better. PageSpeed Insights will show where you can improve your blog’s performance.
Your plugins, Content Delivery Network (CDN), and numerous other factors all affect page speed. The suggestions from PageSpeed Insights will improve your site speed, but if you don’t have a fast hosting provider, you’re putting yourself at a disadvantage from the start.
Conclusion
While conducting regular audits of your blog can be time-consuming, it’s necessary for success. If you’re not fixing issues with your older content, your blog will never reach the audience you want.
In this article, we covered the steps to follow for a thorough blog audit:
- Gather all of your blog post URLs and data.
- Analyze the information you’ve received.
- Optimize your content for search engines.
- Update any facts and statistics.
- Conduct a speed audit.


![How Fast Hosting & Fast Sites Improve Your Bottom Line [Infographic]](https://www.a2hosting.com/blog/content/uploads/2021/01/web-hosting-performance.jpg)
